
Guide To Catch And Release
Decide beforehand which fish are to be kept and immediately release all others.
Try fishing with barbless hooks or crimp and remove the barb. Catch rates using barbed and barbless hooks are not significantly different. Advantages of barbless hooks are the reduction in time required to dehook the fish and less physical damage to the fish from hook removal. There is no difference in mortality between barbed or barbless hooks.
Avoid the use of gaffs or landing nets made of hard polypropylene or nylon that tend to abrade and remove the protective slime from the scales. The most important contributions an angler can make to a successful release are to hook and land the fish as quickly as possible, leave the fish in the water while dehooking, and quickly release the fish.
Cut the leader close to the hook when releasing large jewfish, tarpon, sharks or other fishes that are gut hooked that you do not plan to keep. Do not lift a gut-hooked fish out of the water by the leader; this can increase hook damage.Grouper held with pliers.
Wet your hands or gloves to handle the fish. Do not injure the eyes or gills. Remove as little slime as possible by placing the fish on a wet towel. To keep the fish quiet, place it on its back or cover its eyes with a wet towel. Always Control the fish ! The fish could fatally injure itself against the boat.
If the hook is difficult to remove by hand, use long-nosed pliers or a de-hooking tool. Do not tear additional tissue, but back the hook through the original injury. If this fails, cut the leader and pull the hook through the injury.
If your fish is in good shape, put it back into the water head first. If it doesn’t swim or is lethargic or erratic, regain control to prevent “waste.”
Revive exhausted, but otherwise healthy fish by placing one hand under the tail and hold the bottom lip with the other. Move the fish into the shade, either alongside the boat, under the edge of a dock, or to the bottom. Cooler water contains more oxygen and the fish will revive faster! If the fish is in fair to good shape, merely hold it headfirst into the current. If it is severely lethargic, depress the bottom lip to cause the jaw to gape and gently move the fish forward. Moving the fish in an erratic back and forth motion may only induce more stress. Severely exhausted fish may require 15 minutes to revive. At the first sign of the fish attempting to swim away, let it go, but keep an eye on it. Some fish will swim a short distance, become disoriented, and die, snook especially. Redfish may move into the grass and appear to be dead but swim away when it is touched.

Large pelagics, sharks and tarpon should be brought alongside within 20 minutes of hook-up. Masters Billfish Tournaments require all Grouper held by fishing tool entries be brought alongside within ten minutes. Do not boat large fishes because they are dangerous to both themselves and crew when green. Bringing an exhausted fish out of the water is like placing a plastic bag over the head a marathon runner.
It needs oxygen! Catches that are in good shape should be released immediately by cutting the leader close to the hook. If the fish is exhausted, revive it by making sure the head is totally submerged and tow it slowly forward. Game fishes usually “throw their stomachs” when hooked. Don’t attempt to replace it; the fish will swallow it after release.
If your fish dies despite your best efforts, ensure it meets all regulations then add it to your creel. Otherwise, discard it!
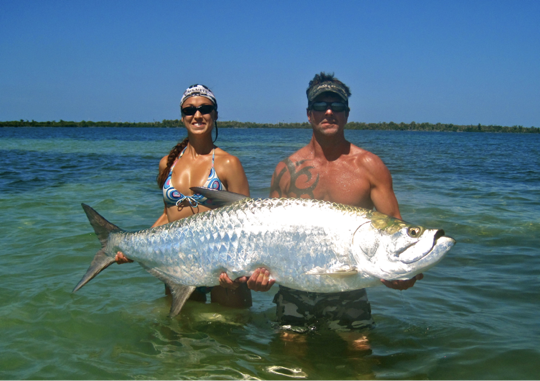
Anglers who fish Florida’s waters enjoy the benefits of many well managed stocks that are increasing in abundance. The bounty that makes Florida fishing so popular can lead to over-exploitation. Our obligation is to limit our harvest to those fishes that meet our strictest requirements, either as food or as a warranted trophy. Wise use of our stocks dictates that the remainder of our catches be released so they may live to fight again.
Circle hooks require a little time to adjust to, but they substantially reduce the mortality of fish because they hook the fish in the jaw thus easy to remove. DON’T SET THE HOOK. DO NOT attempt to set the hook by sharply jerking the rod as this will pull the hook out of the fish’s mouth. Steadily and slowly reel in the slack in the line until the hook sets itself in the fish. This requires some patience and restraint. You have to let the fish “hook” itself. When the fish grabs your bait and swims off the hook comes out of it’s throat and hooks them on the jaw or corner of the mouth.
When attaching live bait, don’t put the hook in the bony portions of the bait, simply hook the bait through a fleshy part of the fish. For trolling it is best to attach the hook to the bait with a rubber band or waxed string which allows the hook to hang freely above the bait.
Using non-stainless steel circle hooks is require by law for live or natural bait fishing in Florida and federal waters. Non-stainless steel hooks will slowly disintegrate in the fish giving them a chance to recover, where stainless hooks last forever and can harm the fish.
You can remove hooks from fish by using pliers, but de-hooking tools or dehookers make the job much easier. De-hooking tools, or dehookers, are instruments that allow the hook to be secured and the barb shielded without re-engaging when the hook is removed from a fish. Dehookers come in a variety of shapes and sizes; use the tool that works best for the fish you are releasing.
Using pistol grip (bent) long-nose pliers allows you to see into the fish’s mouth without your knuckles blocking the view.
A good rule of thumb is to use a de-hooker if you can see the hook. If you cannot see the hook, cut the leader as close to the hook as possible without removing the fish from the water.
You can purchase de-hooking tools on our Shopping page, or click the picture above to purchase our featured model. Watch these videos on how to use a de-hooking tool.
A venting tool can be any hollow, sharpened instrument that allows gases to escape. The venting tool should be inserted 1 to 2 inches behind the pectoral fin at a 45 degree angle. It should only be inserted deep enough to help deflate the fish. Ice picks and knives are not suitable because simply puncturing the fish is undesirable and can result in a mortal injury.
Making your own venting tool is easy. The modified hypodermic needle pictured here is an excellent choice for a fish venting tool. A hypodermic syringe with the plunger removed or a 16-gauge needle fixed to a hollow wooden dowel works well. Larger gauge needles may be harmful to the fish. Cannulas (16-gauge recommended) can often be purchased from farm supply and feed stores. The tool should be cleaned between uses and kept in a safe and accessible place. Chlorine bleach is a good disinfectant. Be sure to cap or place a cork on the tip of the tool after use to prevent personal injury.